 Michael Hunt is one of my husband's dearest friends throughout high school and college. He recently asked Brittany Wiggins to be his wife. We are very excited for them and on top of that, they picked me to make their wedding cake. This will be one of the biggest cakes I have ever done, five tiers! They also picked hydrangeas to be on the wedding cake instead of cala lilies. Stay tuned for a full post of the wedding on June 11, 2011!

Tuesday, December 14, 2010
Wiggins-Hunt wedding preview
Michael Hunt is one of my husband's dearest friends throughout high school and college. He recently asked Brittany Wiggins to be his wife. We are very excited for them and on top of that, they picked me to make their wedding cake. This will be one of the biggest cakes I have ever done, five tiers! They also picked hydrangeas to be on the wedding cake instead of cala lilies. Stay tuned for a full post of the wedding on June 11, 2011!
Wednesday, October 27, 2010
Hail Ceasar
The only reason for the title of this post is a put a crown on my pie. Pecan pie is no where closely related to anything from the Roman Empire. But hey, if it has a crown, it might as well be of Ceasar.
This Maple Butter Pecan Pie is so rich and delicious, it is guaranteed to convert any anti-pecan pie into a huge fan. It doesn't only taste good, it's also a beauty that will surely impress. You will need a small leaf cookie cutter for the decoration.

For the crust, please click here for a recipe. Half the recipe fora single 9-inch crust. Blind bake the crust and save any scrap for the decoration.
To blind bake a crust, transfer the crust onto a 9-inch pie dish. Trim the crust to the rim of the pie plate, leaving no excess. Crimp the edge using a folk. Line the pie dish with foil and chill for an hour. Preheat oven to 400. Fill foil-lined crust with beans, rice or pie weight. Blind bake the crust for 18-20 minutes or until set. Remove beans or rice. Return the crust to oven and bake another 5 minutes. You can reuse the beans or rice for baking but probably not for cooking.
For the filling:
8 oz. pecan halves, toasted
1 cup brown sugar
1/2 cup maple syrup
1/2 cup corn syrup
1/2 tsp. salt
4 eggs
1 Tbsp. vanilla
1/2 stick butter, melted
Preheat oven to 325.
Heat brown sugar, maple syrup, corn syrup, and salt in a saucepan over medium heat until sugar dissolves. In a bowl, whisk eggs and vanilla together. Pour into the egg a little of the hot sugar mixture while whisking to temper the eggs. Slowly whisk in the rest of the sugar mixture and melted butter.
Spread pecan into the cooled blind-baked crust. Pour in the Maple Butter filling.
Spread out the reserved scrap from the pie crust. Cut out little leaves with a cookie cutter. Score the leaves to make veins. Brush the edge of the pie crust with some water or a beaten egg. Place leaves around the edge, brush them with some egg. Bake the pie for 35-45 minutes or until the center is set. Serve at room temperature
Monday, October 25, 2010
A taste of Italy
Tiramisu is one of those things that if you are in Italy, you have to get a slice to make your Italian experience complete. It is right up there with the Vatican city and Venice, in my opinion. Here in the United States, tiramisu is readily available in most Italian restaurants. It has quickly become a favorite among American foodies. I would even go so far to judge the quality of an Italian restaurant based on their tiramisu.
You can find hundreds of different recipes out there for this Italian treat. I have used this one recipe for a few years. Through trials and errors, I am proud to say that this is the closest to a real slice of Italian tiramisu that I've tasted. Instead of lady fingers, I use a few layers of sponge cake. Lady fingers are essentially little sponge cakes, sometime coated in sugar. By making my own sponge cake, I can have a lot more control over the sweetness of the cake. Make it too sweet and you won't be able to make it pass two bites.
Note: I prefer sponge cake over angle food cake. They are pretty much siblings in the cake family, very similar. But for this recipe, sponge cake works much better. Angle food cake makes of egg white without the yolk. The beaten egg white is very glossy, making it a little more difficult to soak with coffee. Sponge cake works like.... a sponge.
Sponge cake
4 eggs, separated
3/4 cup sugar
4 Tbsp. cold water
1 Cup cake flour
1 tsp baking powder
Preheat oven to 325 degrees. Brush three 8-inch pans with butter and dust with flour.
Beat egg yolks and sugar together until very light. Add water. Sift together flour and baking powder. Add to batter. Beat egg whites until stiff. Fold into batter. Pour batter into prepared pans.
Bake for 20 minutes or until tooth pick comes out clean. Let cool for a few minutes before taking them out of the pans.
Coffee soak
2 cups coffee
2 Tbsp. Kahlua or rum
Combine and set aside
Mascapone cream
3 tub of mascapone cheese (8 oz each)
3/4 cup whipping cream
1/2 cup sugar
Beat all ingredients together until light. Mascapone is an Italian cream cheese that is a lot lighter than regular creme cheese. It gives tiramisus their distinct creamy flavor.
Soak the sponge cake one layer at a time in the coffee soak. Be careful not to soak too long or your cake layer will disintegrate in the liquid. It takes some practice. A brush will help getting the liquid soaked into the cake.
After soaking a layer of cake, spread some of the mascapone creme on top and sprinkle cocoa powder onto the creme layer. Repeat with the other two layers and make sure to cover the side of the cake with mascapone creme as well. Chill before serving.

This dessert is such an explosion of flavor. The sweet creamy cream is met with the bitter cocoa and nutty coffee flavor, while the liqueur adds a warm note to a well chilled cake. It is simply decadence at the same time add so much charm to your party.
Monday, October 11, 2010
Brown Gravy
This thick and dark gravy full of flavor and body can be used for any beef dish, from Beef Wellington to Prime Rib. It really adds the extra boost to an already-perfectly moist and tender slice of meat.
Brown Gravy
In a sauce pan, saute:
1 shallots, minced
2 cloves garlic, minced.
After the shallots and garlic are soft, about 5 minute, add:
1 Tbsp. tomato paste
2 Tbsp. butter
2 Tbsp. all purpose flour
Stir together until the mixture turns brown. Then add:
1/3 cup marsala or red wine
Wait till most of the liquid has evaporated, add:
1.5 cups beef broth
Bring to a boil and simmer until thickens, stir frequently.

Friday, October 8, 2010
A meal fit for a Duke/Duchess
Need ideas to wow your guests this holiday coming up? Or you simply want to treat your significant other to a fancy homemade meal? Beef Wellington is one of my favorite things to make. It is amazingly simple for such wonderful presentation. You sometimes see Beef Wellington as one huge pastry-covered tenderloin. I actually prefer to make this dish as individual bundles of goodness. They are full of flavor and each is a work of art.
One of the crucial component to Beef Wellington is Puff Pastry. Feel free to use store-bought one. But if you are up for a challenge, make your own!! Puff pastry is a work of art within itself. I feel like it deserves a whole different post. Click here to find it.
Another important thing about Beef Wellington before we begin is since puff pastry is such a big part of this dish, everything needs to be cooled/chilled to keep the butter layers in the puff pastry from melting. If the butter melts, you end up with a none-puff pastry and it won't brown either. So make sure to cool everything before assembling our bundles of joy. I also try to assemble these the night before so they can chill in the fridge over night. But if you don't have time, half an hour in the freezer will be just fine.
Beef Wellington
4 Fillet Mignons
1 sheet puff pastry (store bought or homemade)
1/2 lb. assorted mushroom, chopped
3 Tbsp. red wine
3 Tbsp. green onion, chopped
1 sprig thyme, chopped
Saute the mushroom in some olive oil. Don't crowd the mushrooms or they won't brown (Yes, I just watched Julie and Julia). Once the mushroom is brown and tender, deglaze with the red wine. When liquid nearly evaporated, add onion and thyme. Set aside to cool completely.
Season your fillet mignons with salt and pepper. Sear both sides of the fillet on high heat. Cool completely.
When you are ready to assemble the beef wellingtons, take out your sheet of puff pastry and roll it out in a flat surface until it's about 1/8 inch thick. Cut the sheet into 4 little squares. Wrap the cool fillet mignons in the puff pastry square. Fold the two opposite corner of the square so that they touch on top of the fillet. Do the same thing with the other corners. Pinch the seams to seal. You can cut out different design from some scrap puff pastry if desired. I like making leaves and pumpkin stems for the fall or holly leaves and berries for Christmas. Be creative!
Chill the Beef Wellington for at least an hour or overnight. When you are ready to bake them, preheat your oven to 400 degrees. Brush the beef wellingtons with an egg wash (an egg with a few teaspoons of water) and bake for 20 minutes or until golden brown.

I also serve this dish with a brown gravy. Click here for the recipe. I do hope you find yourselves pampered like a Duchess/Duke as you enjoy this dish.
Monday, October 4, 2010
Extraordinary Women
This past weekend, I got to spend two days with some extraordinary women as we joined 10,000 other women at the Roanoke Civic Center to worship our God. It was quite a taste of what is to come once all nations and tongues confess that Jesus is Lord.
My friend, Barbara, and I also had the privilege of serving lunch for our group of twenty lovely ladies. We made a three sandwich fillings: Chicken Salad, Greek Salad, and a Shrimp Salsa. We stuffed these in large croissants with a few leaves of lettuce. And lunch was served!
Shrimp Salsa
Makes 2 cups
1/2 cup diced tomatoes
1/2 cup minced red radishes
1/4 cup minced red onion
1/4 cup minced cilantro
1 tsp. minced garlic
1 lb. shrimps, peeled and deveined
Juice of a lime
Combine tomatoes, radishes, onion, cilantro, and garlic in a bowl.
Toss shrimp with oil, salt, and pepper. Saute until cooked through. Chop shrimps into bite-sized pieces and add to the vegetable mixture. Stir in lime juice.
Greek Salad
Makes 2 cups
1 red bell pepper, seeded and diced
8 oz salami, chopped
1/2 cup feta cheese, crumbled
1/2 cup kalamata olive, pitted and sliced
2 tsp. dried oregano
Minced zest of a lemon
2 Tbsp. olive oil
Juice of a lemon
Black pepper to taste
Combine bell pepper, feta cheese, olives, salami, oregano, and lemon zest in a bowl.
Whisk together oil and lemon juice. Season with black pepper.
Toss the vegetable mixture with the oil and lemon juice until coated.
Chicken Salad
Makes 2 cups
1/2 cup mayonnaise
1/4 cup white/rice vinegar
1 Tbsp. sugar
1 cup cooked chicken, cubed
1 cup diced celery
1/2 cup chopped green onion
Combine chicken, celery, and green onion in a bowl.
Stir together mayonnaise, vinegar, and sugar.
Toss the chicken with the mayonnaise mixture. Chill until serve.
These are very easy recipes that can stretch food for a big party. These three recipes feed 20 ladies. And we even got second. You can serve these salad with any kind of bread or even with chips. I hope you will also enjoy making something extraordinary out of the ordinary just like how our God makes us.
Monday, September 13, 2010
McCoskey-Laguarda preview
A few weekends ago my husband and I gotta go see a few friends at a Lake in TN. Our friends' parents were so kind to let us use their amazing lake house for a weekend of reunion with great friends. One of them just got engaged and they were kind enough to let me make their wedding cake.
Sarah and Gonzo (yes, that is his name) wanted to have a 4 tier cake with chocolate drizzled in between each tier with red roses cascading down the side of the cake, very tasteful. I enjoy the color scheme and very much looking forward to making 50+ sugar roses. Hopefully once the wedding is here they will give me permission to write a little blurb about them and their relationship with some picture of the real wedding cake. Their flavors of choice are Grand Marnier and Italian Creme.
Here is a picture of the sample cake that I made for them at the lake house.

A briny hit of the Mediterranean Sea
I made this Greek Shrimp Salad last week for our regular International Wife Group meeting. I thought it was appropriate with the International theme. Unfortunately, I did not get around to taking a picture before everything was gone. And that's how you know that it's good. This salad is loaded with flavor and good for you at the same time, hard to believe, eh?
Clean 1/2 lb. of medium shrimps, season with salt and pepper to taste. Sear them in some olive oil until fully cooked.
For the dressing:
Combine
1/4 cup feta cheese
3 Tbsp. olive oil
2 Tbsp. red wine vinegar
1 Tbsp. fresh lemon juice
1 Tbsp. yellow mustard
2 tsp. sugar
2 tsp. minced garlic
1 tsp. oregano
You can put all the above ingredients in a food processor to make a creamy dressing. Or you can just shake it in a bottle and get a nice vinaigrette.
For the salad:
Combine
1 cup diced tomatoes
1/2 cup diced cucumber
1/2 cup diced yellow bell pepper
1/4 cup slivered red onion
1/4 cup halved kalamata olives
1/4 cup feta cheese
Toss the the shrimps and vegetable with the dressing. You can serve over a plate of shredded spinach or lettuce if desire.

Saturday, September 11, 2010
Ever wonder what to do with giant zucchinis and squashes?
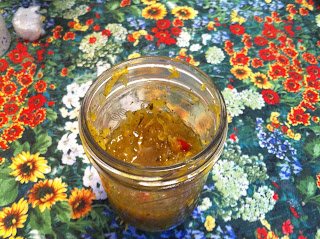
I have been involved with a group of international wives in Blacksburg, VA whose husbands are students/scholars at Virginia Tech. I've thoroughly enjoyed getting to know these ladies through learning about their cultures as well as sharing all kind of "strange" things that we do here in America. One of those things is canning food, which our friends had never done before.
Last week, one of our lovely host ladies had us over to show us how the whole canning process works. I have done some canning. But the extend of my canning only goes as far as making a few jars of jam. Sarah (our lovely hostess of the morning) doesn't only know everything there is to know about canning, she's the Proverb 31 woman that I always envision. She has three children, a beautiful house in the country where she and her husband raise a cow, some goats, and any plants I have ever heard of, from zucchinis to grapes. I have regularly heard from Sarah things like "Oh, I made cheese last week," or " I make my own soap." On top of that, Sarah is a nurse. Incredible, I know! I often wonder if the woman ever sleeps.
Sarah led us into her little kitchen where two giant pots sat on the stove, one was a regular water bath canning pot and the other was a hard core pressure cooker, rather intimidating. As she walks us through different kinds of canning processes, Sarah pulled out jars after jars of canned goods from pickles to peaches that she and her family have done over the years. One specialty that is described as a regular at her house is a zucchini sweet relish. The recipe was passed down from Sarah's husband's grandmother. The main ingredient for this relish is overgrown zucchinis or squashes. She showed us a few of these giants and they are about the size of your arms.
 Sarah was also gracious enough to share with us her recipe as well as allowing me to post it on my blog. This recipe has won a local contest here in Virginia.
Sarah Broomell's Zucchini Sweet Relish
Yields 15 cups
Combine:
10 Cups grated zucchini (not peeled)
5 Tbsp. salt
3.5 cups onion (4 large onions)
Let stand over night. Drain and rinse with cold water. Then add:
2.5 cups cider vinegar
5 cups sugar
1 tsp. each of nutmeg, turmeric, and dry mustard
2 Tbsp. celery seed
1/2 tsp. black pepper
1 Tbsp. cornstarch
1 Green pepper
1 Red pepper
Bring all to a boil, stirring frequently, can use pimentos.
Place in clean jar, leaving 1/2 inch of head space, wipe rim clean. Process in boiling water bath for 10 minutes.
You can use this relish as a substitute in any recipe that calls for pickle relish such as egg salad, potato salad, serve it with hotdogs or hamburgers.
 I am not a big fan of relishes but this sweet-and-savoriness together with a fusion of spices really won my heart over. I will have to try whipping up a few jars of this amazing condiment.
Thursday, September 9, 2010
Souffle: What rises must fall
I have gotten a few requests for souffle. Most people think souffles belongs to hoity-toity French bakery. But I am happy to inform you that it is no where near the truth. As long as you know how to whip some egg whites, these airy specialties will be pulled out of your own oven perfectly fluffy.
The most well known souffle out there is chocolate souffle. But you can really get creative with just a few basic steps, substitute sweet for savory and you've got yourself breakfast and even dinner. I made some chocolate souffle a few nights ago so I thought I'd start with a dessert souffle. Stay tune for a savory breakfast souffle soon to come.
CHOCOLATE SOUFFLE
This recipe yields two 6-oz souffle
2 tsp. butter, melted
2 Tbsp. sugar
1/4 cup bittersweet chocolate chips
2 Tbsp. milk
1 Tbsp. sugar
1 tsp. almond paste or extract
1 tsp. vanilla extract
1 1/2 tsp. cornstarch
2 egg yolks
2 egg whites
1/8 tsp. cream of tartar
Preheat oven to 375 degrees. Coat two deep ramekins with melted butter. Sprinkle with 2 Tbsp. sugar, make sure to coat the sides. Set aside
Combine milk, chocolate chips, 1 Tbsp sugar, almond paste, vanilla, and cornstarch in a saucepan over medium heat. Whisk until smooth and thick. Whisk in egg yolks one at a time. Cool mixture to room temperature.
Beat egg whites, cream of tartar, and salt until stiff peaks form. Whisk a third of the whites into the chocolate mixture until there are no streaks. Fold in remaining whites.
Fill prepared ramekins to the top with batter. Bake for 30 minutes until souffles are puffed.
Voila, you just made your very first souffle. The only trick to this French delicacy is it needs to be served right away. Otherwise, like the title of this post, what rises must fall. The souffles will deflate if you wait to long to serve them. Bake these in the oven while you are having dinner and they will be perfect once it's time for dessert.

Thursday, August 26, 2010
Wedding cake
I've been slacking for a little while. Between vacation and a few summer projects around town, I haven't gotten anything exciting in the kitchen to write about. Or I was just tired of my little Sony point and shoot that makes my dishes a little less appetizing than normal.
But I am happy to announce that I have started doing some wedding cakes. Well I haven't done any yet but will be next year. Below is a mock up cake to be tasted by two of my clients who will be married next June. Hopefully I can write a little blurb about them after the wedding.

I will also write more about those little calla lilies after the wedding. And maybe I will share some secrets of the trade one of these days.
Friday, June 4, 2010
How to clean and season your grill after every use
After cooking your food, leave your grill on high for a few minutes to burn off all the food residue. Then scrub it down with a brush. If your grill grate is ceramic, don't scrub it with the metal scraper at the end of your brush or it will scratch off the finish on the grates.
After scrubbing off your grill, turn it down to medium. Fill a small bowl with some cooking oil, dip a paper towel in the oil and wipe it over the grill grate. Use enough oil to coat your grill but not too much that it drips and catch on fire. This is call seasoning your grill. Just like a good cast iron skillet, the grill grates benefit greatly from being seasoned. The cooking surface develops a nonstick quality and the pores are permeated with oil, water cannot seep in and create rust that would give food an off-flavor. Your grill is ready to be put away till the next use!
After scrubbing off your grill, turn it down to medium. Fill a small bowl with some cooking oil, dip a paper towel in the oil and wipe it over the grill grate. Use enough oil to coat your grill but not too much that it drips and catch on fire. This is call seasoning your grill. Just like a good cast iron skillet, the grill grates benefit greatly from being seasoned. The cooking surface develops a nonstick quality and the pores are permeated with oil, water cannot seep in and create rust that would give food an off-flavor. Your grill is ready to be put away till the next use!
Cedar Plank Salmon
Not a fish lover? This recipe will win you over. The salmon is so flaky and infused with smoky flavor from the Cedar plank in a sweet and tangy rub. Salmon is low in Sodium and an excellent source of protein, vitamin B12, and iron. I paired these salmon fillets with some grilled potatoes and green beans.
First thing first, you can get some cedar planks at the grocery store down the grilling isle. It is a seasonal thing so our local Kroger does not carry them year round. They can be hard to be spotted sometimes. But guess what, Lowes always have them! I might start stocking up for when I feel like grilling salmon and don't want to drive all over town looking for these planks.
First step, you need to soak your Cedar plank for at least an hour. Soaking helps the plank not to set on fire on the grill and also promotes more smoke. Always soak for an hour or more. If you shorten the soaking time, all you will have is some ash between your salmon and the grill grate. Very important!
Preheat half of you grill to medium high heat and half to medium heat.
For the Salmon rub:
Combine:
2 Tbsp. Brown Suagr
2 tsp. each: salt and pepper, minced garlic, and paprika.
Rub generously over your salmon fillets.
When your grill is preheated, put the soaked plank on the medium high half of the grill and cover for 5 minutes. Keep a spray bottle of water at hand in case the plan flame up, spray to put it out. After 5 minutes, turn the plank over and move it to the medium heat side of the grill. And put the salmon on the plank, skin side down, together with a few lemon halves, cut side down.
Your salmon should be done in 8-10 minutes. Be careful not to over cook them. In fact, it is ok for the fish to be slightly under cook. The residual heat will finish it off when you take it off the grill. If you overcook your fish, it will be rather dry and tough (Kinda like how our local Bull and Bones cook their fish, not very appetizing).
 While waiting for your salmon to cook, you can throw your sides on the grill too. For the potatoes, I preboiled them before putting them on the grill so they would cook faster, around 15 minutes. Toss the green beans with some oil, salt, and pepper before grilling them for 5-7 minutes.
When you take the salmon off the grill, let it rest a few minutes. The resting step is not as important with fish as other meat though. Squeeze the lemon over your fish before serving. Enjoy!

Thursday, June 3, 2010
New Series "30 minutes with your grill"
I've been a little MIA with the blogging world. I just needed to find some inspiration, not just to keep people interested in my blog but to keep myself interested in writing as well. So I thought now that the summer is here, it's grilling season!
Grilling is not just fast, it is also a quick and healthy way to cook your meal. On top of that, the flavors of food are so much more enhanced after a few minutes on the grill. If you have read my previous posts that involves grilling, you know I am a big fan of indirect heat grilling which could take around two hours. So if you having a cook out, that is the way to go. But if you want a quick meal on a week night, this series is for you.
These recipes take no more than 30 minutes to prepare and the result is top quality. And not just quality, the way they look will keep your family amazed. I will also walk you through a few quick and easy maintenance for your grill that will keep it performing like new.
Tuesday, May 25, 2010
Slow and steady wins the race
In contrast to my last post, this one takes a few hours to do. But it is worth every second! Osso buco is an Italian stew originated from Milan. Loosely translated from Italian it means "hollow bones." Hence the name, it is made of veal shanks (with a bone in the middle) cooked in meat broth, and flavored with white wine and vegetables. Slowly braised, this tough, yet flavorful cut of meat becomes melt-in-your-mouth tender, and the connective tissues and marrow dissolve into the sauce, making it rich and creamy. This dish can be fabulous or just mediocre. A really good osso buco has that tangy, rich depth of flavor that can only be obtained by layering flavors.
A risotto has been the perfect match for a pot of Osso buco. I made a saffron risotto, which gives a very attractive shade of yellow to be topped off with the dark and rich osso buco gravy. Risotto is an Italian rice that is quite time consuming to make. But when done right, it is rich and creamy while still al dente! What you get at a restaurant will never compare to a homemade risotto that wasn't effected by the dinner rush.
Osso Buco
1. In a Dutch oven with a tight-fitting lid, heat:2 T olive oil over medium high heat
2. Season:
4 veal shanks with salt and pepper on both sides
3. Brown them on all sides. Then remove the shanks to a plate, set aside
4. Add to the same pot:
2 Tbsp. extra virgin olive oil
2 Tbsp. butter
1 red onion, coarsely chopped
½ green bell pepper, coarsely chopped
½ red bell pepper, coarsely chopped
3 carrots, peeled and coarsely chopped
1 large stalk celery, coarsely chopped
5-6 cloves garlic, thinly sliced
5. Stir well to coat, then cover. Sweat the vegetables for about 10 minutes
6. Then deglaze with:
1/3 cup Marsala wine (or dry sherry)
1/3 cup brandy
1 T balsamic vinegar
7. Simmer for 5 minutes
8. Add:
2 T tomato paste
1 sprig rosemary
4 sprigs thyme
2 bay leaves
9. Simmer for a few minutes
10. Add:
The reserved browned shanks
2 cups chicken broth
11. Then put your Dutch oven in a 325 F preheated oven and cook for 1-1.5 hours.
12. When it's time to take your dutch oven out, remove the shanks to a plate then strain the sauce.
The dish is to be garnished with a gremolata mixture:
Combine:
2 T chopped Italian Parsley
1 clove garlic, minced
½ t grated lemon peel
1 T lemon juice
About half an hour before the Osso Buco comes out of the oven, prepare your risotto.
In a small sauce pan, heat about 4-6 cups of chicken broth and a tsp. of crushed saffron. Keep simmered while preparing the rice.
In a saute pan, heat:
2 Tbsp. olive oil
then add:
1 Tbsp. minced shallots
After the the shallot is fragrant, add:
2 cups short-grained round or semi-round rice; among the best rices for making risotti are Arborio, Vialone Nano, and Carnaroli.
Saute the rice until translucent, about 7-10 minutes
Heat up about 1/2 cup of white wine in the microwave then pour the hot wine over the rice and stir (if it is cold you will shock the rice, which will flake on the outside and stay hard at the core).
Once the wine has evaporated completely, add a ladle of simmering broth; stir in the next before all the liquid is absorbed, because if the grains get too dry they will flake.
Continue cooking, stirring and adding broth as the rice absorbs it, until the rice barely reaches the al dente stage (if you want your risotto firm, time your additions of broth so that the rice will finish absorbing the broth when it reaches this stage; if you want it softer, time the additions so there will still be some liquid left).
Stir in a tablespoon of butter and the grated cheese, cover the risotto, turn of heat. Let it sit, covered, for two to three minutes.
Serve your risotto with a ladle or two of the osso buco sauce, top with a veal shank, and garnish with the gremolata mixture.

This dish takes quite a bit of time and effort, but the result is worth it. This can easily cost $40/plate at a nice Italian restaurant. But making it at home will cost you about $20 to have a dinner party of four. The tangy and rich flavor of the stew together with the creaminess of the risotto will keep your guests coming back for more!
Dinner in a zip!
This is one of my favorite things to make. But then, if you haven't noticed, everything is my favorite thing to make. What I like so much about this dish is it is perfect for those days when you don't feel like spending an hour making dinner. This is one of those meals that you spend 15 minutes at most without compromising its freshness.
I am a big fan of making things from scratch. So the down side of that is if I don't cook, there's nothing edible in the fridge. That's why I keep a few of these recipes on hand for a quick dinner without sacrificing its gourmet-ness.
Shrimp Scampi
 Preheat your oven to broil
Melt in a saucepan:
1 Stick butter
then add:
1 Tbsp. fresh dill
2 cloves garlic, minced
salt and pepper to taste
1 Tbsp. fresh lemon juice.
Let it sit while preparing the bread crumb
Combine:
1/2 cup bread crumb
zest of 1/2 lemon
1/4 cup fresh grated Parmesan
1 Tbsp. chopped fresh parsley
Shell and de-vein about 1 lbs of shrimps. Arrange them on an oven proof pan. Pour the butter mixture over the shrimps and top with the bread crumb mixture. Broil the shrimp for 5 minutes until the bread crumb brown and shrimps turn pink. The time varies with different ovens, but it shouldn't be much longer than 5 minutes.
Pair the shrimps with a salad and dinner is served!
Sunday, May 23, 2010
Anyway you slice it
In college, one of my roommates' aunt had an apple orchard in Pulaski, about half an hour away from Virginia Tech. We would go apple picking almost every other weekend. These were the most organic apples I had ever seen. Some even had worms in them. Quite a treat. And of course, there would always be apple pies at our house. This was when I mastered the pie making skill. I probably made 20 something pies every fall.
It's not too far from the truth to say that Seth fell in love with me for my pies. Not a big fan of eating apple pies myself, but I love making them and giving them away to friends. These were our thank you gifts to anyone who ever helped us with anything around a house of four college girls who couldn't seem to get any appliance to work properly.
This pie crust recipe is almost foolproof. And once you taste it, store bought pie crust will never do. Butter and shortening ensure that your dough will be both flaky and tender. You can use this recipe for any kind of pie you are making, pumpkin, apple, pecan..., and even quiches.
Through trials and errors, I've learned a few tricks over the years:
1)Always use cold ingredients, butter, shortening, even put your flour in the freezer for a few minutes. This helps keep the dough flaky.
2)Always chill your dough for at least an hour before rolling. This makes the dough easier to handle.
3)After assembling your pie, pop it in the freezer for a few minutes for the butter to harden again before baking. What make pie crusts flaky are the pieces of butter in the dough that melt during baking (not rolling), leaving flaky pockets in your dough.
Pie Dough (enough for 2 pie crust or 1 double crust)
Blend together:
3 cups flour
1/3 cup sugar
1/2 tsp. salt
Then using a pastry cutter or the paddle attachment to your stand mixer to cut in:
1.5 sticks cold butter, cubed
1/2 cup cold shortening, cubed
Cut until the consistency of split pea. Then stir in:
4-6 Tbsp. cold water
2 tsp. distilled vinegar
The vinegar helps break down the protein that might develop in the dough to keep it tender.
Divide your dough in half, wrap them in plastic wrap and chill for at least an hour.
Peel and cut into wedges about 7-8 apples of any variety that you like. I personally like pink lady because they are crisp and slightly tart, great for baking. Toss your apple wedges with:
1 cup sugar
1 tbsp. cinnamon
3 tsp. nutmeg
Roll out half your dough, transfer it to a 9" pie pan. Be careful not to stretch your pie dough. If your dough is stretched, it will shrink during blind baking.
You can choose whether or not you blind bake your crust. I wouldn't worry about it if it's apple pie made from fresh apples without too much juice. But if you are making a pecan or pumpkin pie, you should blind bake your crust before pouring your filling in the crust. This will help the crust from getting soggy.
To blind bake your crust, preheat oven to 400 F. After fitting dough to the pan, line it with foil and chill in the freezer for a few minutes. Fill with beans or rice and bake for 10 minutes. Remove the beans and foil, and bake for another 10 minutes. Cool completely before filling.
Arrange your apple wedges inside the pan. Roll out the other half and cut into strips to make a lattice design. Flute the edge of your pie. This is an apple pie so I didn't blind bake it. And you can't really blind bake if you want to do a double-crust pie. Weaving lattice strips is too much work for you? Just roll out the dough and place it on top to make a full top, cut slits for the steam to escape. You'll still get a beautiful pie. I really enjoy making lattice though!

Pop the pie in the freezer for a few minutes. Then bake for an hour to an hour and 15 minutes in a 400 F preheated oven. During baking, if the edge your pie is getting too brown too quickly, use a pie shield to keep it from burning. Otherwise, your pie will turn out like the one in the picture below. I was busy with a few other things and forgot to check the pie while baking.

Not quite a cook out without sides
I think my husband and his male friends would be perfectly content with the a few racks of ribs at a BBQ. But it is not quite the same for me without the potato salad, baked beans, and such. Here are a few recipes I got from Cuisine at Home to spice up your cook out.
Bourbon Beans

Saute 3 strips bacon, diced, until crisp
Add 1 cup diced onion and cook until soft
Off heat, deglaze the skillet with 1/4 cup bourbon. Simmer til bourbon nearly evaporated
Stir in:
2 cans red bean, drained and rinsed (15 oz. each)
1 cup chopped tomatoes
1/4 cup ketchup
2 Tbsp. Worcestershire sauce
2 Tbsp. brown sugar
2 Tbsp. molasses
1 Tbsp. prepared yellow mustard
1 tsp. Tabasco sauce
Bring to a boil, reduce heat to medium-low, and cook 5 minutes.
This is one of the best homemade baked beans I have ever had. The bourbon is subtle, keeping your guests guessing what's so special about your baked beans.
Potato Salad
 Boil 12-15 minutes:
1.5 lbs. white potato, cubed
2 large eggs.
Drain the potato and let the eggs cool.
Toss the potato with 1/4 cup pickle juice and let cool to room temp.
Peel, chop, and add the egg to the potato.
In a separate bowl combine:
1/2 cup mayonnaise
1/2 cup chopped sweet gherkins
1/2 cup diced celery
1/4 cup chopped green onion
2 Tbsp. chopped fresh parsley
1 Tbsp. prepared yellow mustard
1 tsp. sugar
Salt and pepper to taste
Pour dressing over the potato and stir gently to coat. Serve salad chilled.
Deviled Eggs

There are a few tricks to making deviled eggs.
1) Use 7-8 day old eggs, they peel a lot easier that fresh eggs.
2) The night before making these eggs, put your egg carton on it side so that the yolk gets moved to the center, making your deviled eggs look more even and pretty.
Put 12 eggs in a saucepan covered with cold water. Bring eggs to a boil over high heat. As soon as water boils, turn off heat, cover pan, and let stand for 12 minutes. This will ensure your yolk is cooked just right, not too runny and not to turn blueish from over cooking. Run cold water in the pan, then peel and halve lengthwise. Carefully scoop out the yolks, set whites aside.
Mash yolk with:
1/2 cup mayonnaise
2 Tbsp. minced fresh parsley
2 tsp. each pickle juice, Dijon mustard, and apple cider vinegar.
1/2 tsp. cayenne
1/4 tsp. dry mustard
Spoon or pipe the yolk mixture into egg white halves.
Grilled Vegetables
While your grill is hot, why not throw some vegetable on there and have yourself some healthy sides? It's so simple and really enhances the flavor while keeping in all the juices. Toss them in oil, salt, and pepper before throwing them on the grill.
Green beans: grill over direct high heat for 3-5 minutes
Sweet potatoes: peel and slice into 1/2" wedges, grill over direct medium heat, turning often, 15-20 minutes
Summer squash or regular zucchini: Bias-slice into 1/2" planks. Grill over direct high heat 5-7 minutes.
Whole baby zucchini: Grill over direct high heat for 7-10 minutes
You can also grill other varieties of vegetables, such as asparagus, corn, peppers, tomatoes, onions, ect.
These sides go great with ribs, BBQ chicken, or even just burger and hot dogs. They really make any gathering so much more filling and festive. Enjoy!
Saturday, May 22, 2010
Robin Hood Chicken
Not sure how the dish got its name. But it is characterized by the rub mixture of herbs, olive oil, and lemon juice. The chicken has such a tangy flavor from the lemon juice, while the herbs are infused into the meat through indirect grilling techniques. This is so far one of my best chicken recipe that I collected from Cuisine at Home.
For the rub, combine and pulse in a processor:
1.2 cup olive oil
1/4 cup fresh lemon juice
3 Tbsp. each chopped fresh rosemary, parsley, and garlic
1 Tbsp. salt
1 Tbsp. black pepper
I use chicken quarters for this recipe because sometimes they can be on sale for pretty cheap. You can buy whole chickens and cut them yourself by cutting along both sides of the backbone and along the breastbone to separate the two halves.
Rinse chicken and dry with a paper towel. Rub the chicken pieces generously with the herb mixture and refrigerate for at least an hour.
Preheat half of your grill to medium high. Put the chicken on the unlit side of the grill and cover. Rotate the chicken every half an hour for even cooking. They are done when an instant thermometer reads 165 F. This will take a while, around 25 minutes per pound. After the chicken is done, let them rest for 15 minutes before serving.

This techniques is so gentle that even if you leave the chicken on there for longer, they still come out tender and moist. Indirect heat grilling is one of my favorite way to grill. Everything comes out so moist and induced with a smoky flavor from the amount of time they were on the grill. Direct grilling doesn't quite give you that affect that meat tends to dry out a lot faster over the flame.
Friday, May 21, 2010
BBQ Ribs
My husband, like most men, is a big fan of BBQ ribs. They can be pretty expensive at some restaurant. But as shown in my previous post, making them at home doesn't cost much at all.

Before we start, I just want to give you a little background about ribs. You have probably seen the two types of ribs on rack out there, Spareribs and baby back ribs. These terms simply refer to different portions of the same rib cage. Baby backs are the ribs at the very top of the hog's back. These ribs are small and often pricey. Calling them "baby" has nothing to do with the age of the hog but rather their size and weight.
Spareribs are the lower section of the rib cage near the hog's belly. There are more muscles in this area, making the meat tougher and fattier than baby back. Because spareribs come from the same area as bacon, they are very flavorful. I actually prefer spareribs for their flavor and cost over baby backs.
Now, let's get started. These techniques can be used on both spareribs and baby backs. Hard core meat smokers will look down on me for this, I pre-roast my ribs in the oven! I haven't gotten into smoking meat yet. It seems like a pretty expensive and time consuming hobby. But for now, pre-roasting will do just fine. Pre cooking your ribs in the oven gives your ribs the tenderness, while charring it on the grill afterward gives it the crunch around the edge, which are the characteristics of quality ribs.
First step, rubbing your ribs (recipe from Cuisine at Home). Combine (This will be enough for two racks of ribs):
2 Tbsp each of salt, black pepper, brown sugar, and chili powder
1 Tbsp each paprika, dried oregano, and thyme leaves
Generously rub both sides with the rub, place your ribs on a baking sheet and cover them tightly with aluminum foil. Than roast them for 2 hours in a 300 F preheated oven. After 2 hours, your ribs should be ready for the grill. You can tell by the way the meat shrinks back to expose 1/2-1" rib bones around the edge.
While waiting on your ribs to roast, you can start on your BBQ sauce. By no mean, you can use any store bought sauce out there. But if you are up for the challenge, making your own sauce will let you be in control in choosing flavors that fit your appetite. Refer to my chicken wings post for a few ideas. Here is another flavorful recipe to get you started. This tangy BBQ sauce uses bock beer, which gives it a non-bitter, malty flavor. It can also be use for dipping sauce.
Bock Barbecue Sauce
Sweat in 2 Tbsp olive oil over medium heat until onion is soft:
1/4 cup onion, diced
1 Tbsp. garlic, minced
2 tsp. chipotle in abodo, minced
Add:
1 bottle Bock beer
1/2 cup apple cider or apple juice
1/2 cup ketchup
1/3 cup apple cider vinegar
1/4 cup brown sugar
1 Tbsp. Worcestershire sauce
1 Tbsp. prepared yellow mustard
1 tsp. ground celery seed
Increase heat to high, bring to a boil and reduce to 1.5 cup. Then stir in
1 Tbsp. lemon juice
Salt and pepper to taste.
You can either grill your ribs over direct heat until charred, 15 minutes, or you can smoke them over indirect heat. Smoking them takes about an hour for the ribs to develop a nice charred layer on the outside and induced with a smoky flavor.
To prepare for smoking your ribs, soak a bag of wood chips in water according to directions on the package. You should be able to get a varieties of wood chips in any grocery store down the charcoal aisle.
To smoke your ribs, preheat half of your grill to high and leave the other half unlit. The temperature of your grill should be maintained between 300-400 F. Place the soaked chips in a disposable aluminum pan with small holes poked in the bottom for the smoke to get through. Then place the aluminum pan on the lit portion of the grill and the ribs on the unlit portion of the grill. Slather your ribs with the bock BBQ sauce every 15 minutes. This helps keep them moist.
After an hour of smoking, your ribs should be done, tender in the middle with a nice crunchy layer on the outside. These ribs have a lot of flavors and texture. Let the ribs rest 10 minutes, then slice them into individual ribs by holding the rack vertically and slicing down between the bones. I thoroughly enjoy making these ribs. Quite a bit of work, but the result will impress all your rib-loving guests.
Thursday, May 20, 2010
Low cost high volume
As you see, I've been a little delayed in making new posts but give my blog a face lift instead. Really rusty in my html, but it's coming back to me with some help. Hope you enjoy this new pinkie-up look.
Having a lot of company but trying to save money? A cook out is your answer. We had a dinner party for twelve two nights ago. With the main dish, sides, and desserts, you can spend hundreds of dollars easily. But guess what, you can get away with as little as $40. The secret is a freezer and stocking up when there are good deals. Below is a break down of the cost for the dinner party. I didn't include things that people usually already have in their pantry/fridge like mayonnaise, pickles, mustard, flour, sugar, spices, and such.
MAIN DISH
BBQ Ribs: $9/2 racks from Sam's club
Grilled Chicken: $2.99/10 pieces special at Kroger
Total cost for main dish: $12
SIDE DISH
Classic Potato Salad: $4
Deviled Eggs: $1.44
Bourbon Bean: $3
Grilled Vegetables: $4
Grilled Corns on the Cobs: $4
Total cost for side dishes: $16.44
DESSERTS
Homemade Apple Pie: $3.49
French Chocolate Silk Pie: $8
Total cost for desserts: $11.49
Total cost for a dinner party of 12: $39.93
Very affordable! Of course there is an opportunity cost involved here. Less money spent means more making from scratch. It really isn't as bad as it sounds. It took me around 3 hours to finish everything. Well, that is not counting the hours scrubbing our grill after a winter of idleness. We probably should clean our grill right after the last use this fall before putting the cover on it for the winter.
There are quite a number of recipes here. So I think I am gonna make a few different posts so that it's not too overwhelming to scroll through a mile-long post. Enjoy!
Monday, May 17, 2010
Pot roast is how you spell comfort food
It is true. Or at least for me it is. It's not quite as appealing in the summer heat, I suppose. But a pot roast will take away your blue on rainy days like these in Blacksburg, VA.
There are numerous different recipes for pot roasts out there. But this one is my favorite so far. A rich flavor is induced in the meat through two simple techniques, searing and braising. It is so tender you can cut with a fork!
A lot of pot roasts are made with a slow cooker but I prefer my cast iron Le Crueset French oven. But really, I like to cook anything in my French oven. Enameled cast iron is expensive but it is worth every penny. I assure you that you will pass one of these down to your grandchildren in almost perfect condition.
But with this recipe, I like my French oven because it takes less time to cook than a slow cooker. The tight lid keeps the moisture from escaping the pot, keeping my roast from drying out. I also use a chuck roast since it is more marbled, which gives the meat more flavor as the fat melts during cooking.
Pot Roast
Mix together:
2 lbs. chuck roast
4 cloves garlic
2 tbsp thyme leaves
2 tbsp olive oil
Cut slits in the roast on both sides and stuff the garlic-thyme mixture into the slits. Heat 1 tbsp. of olive oil in a French oven and sear both sides of the roast (Searing means quickly cook the outside of the meat on high heat til brown. It helps seal the flavor and the juice). Take the roast out and let it rest on a platter.With the dripping in the pot, sweat:
1 onion, diced
1 cup celery, diced
1 cup carrot, diced
Once the onion is soft, stir in 1 tbsp of tomato paste. Cook until the tomato paste is brown, stir in 1/4 cup flour and cook till the flour is mixed in. Then deglaze with 1/4 cup red wine, make sure to loosen any brown bit on the bottom of the pot. This add a lot of flavor to the sauce. Cook until nearly evaporated. Then add 2 cups of beef broth. Return the roast to the French oven, cover, and put the pot in a 300 F preheated oven. Let roast for 2 hours.
After 2 hours, take the pot out of the oven, take the roast out on a platter. Strain the sauce, return it to the pot and add:
2 cups cubed potato
a few carrots, quartered
Put the roast back in your pot. Put the pot back in the oven for another hour or so. And your pot roast is ready.

I thoroughly enjoy this recipe. It requires quite a bit of time, but you can totally ignore it in the oven. Next time the weather calls for something warm and savory, give this pot roast a try and let me know what you think!
Crazy for Panini?
My husband is. He can have a panini for every meal if I was willing to drag out and clean up our Mario Batali cast iron panini press everyday. It is quite a heavy press. But I've been very happy with it for the past two years every time I felt like it's time to treat my boy friend now husband to a homemade panini.

Panini is an Italian sandwich. What makes it so unique is after the sandwich is assembled, it is grilled and pressed so that the cheese melts, gluing the two pieces of bread together. Quite an invention, I tell ya!
Paninies are quite easy to make. They do take time and patience if you choose to do everything from scratch. I made my own sourdough bread for Panini until I discover Panera's sourdough, which they even slice them for me. I've gotten a little lazy.
This is one of those dishes that you can make with anything that fancies your apatite. Chicken, roast beef, tomatoes... anything you want. Just have to choose the right condiment to go with your main ingredient.
On Saturday, I made a South-western Chicken Panini for lunch after my husband (Seth) spent the whole morning digging 3-foot deep holes in our yard for a fence. He was quite pleased.
South-western Chicken Panini
For the cilantro pesto, pulse together:
3 tbsp. cilantro, packed
1 jalapeno (seeded diced, use less if you don't like spicy)
2 cloves garlic
salt
olive oil
The pesto should be creamy in texture when done.
For the chipotle mayonnaise, mix together:
1 tbsp. minced chipotle in abodo*
1/4 cup mayonnaise
*Chipotle in Abodo comes in a can. I usually only use 1-2 tbsp. at a time. So I usually put the rest in a ziplock bag and freeze it. Next time you need some, just cut out the desired amount and put it back in the freezer.
And you will need a few slices of sourdough bread, left over chicken cut into pieces, Havarti cheese, and butter.
To assemble the panini, spread the pesto on one slice of bread, top with a few slices of cheese, then chicken. Spread the chipotle mayonnaise on the other slice of bread and put it on top of the chicken. Spread butter on the outside of the sandwich, this will keep the bread from sticking to your grill.
Now you are ready to grill and press your panini. Don't have a panini press? Use a regular frying pan and press with another frying pan on top.
Preheat your press/frying pan on medium high heat. Grill your sandwich 2-3 minutes per side. Press down on the sandwich while grilling for even toasting and make sure that the bread slices stick together. And you just made a panini!

South western is not your thing? Substitute the cilantro pesto with a regular pesto by using basil instead of cilantro and pine nuts instead of jalapeno. Skip the chipotle in your mayonnaise. And use mozarella instead of havarti cheese. And you got yourself an Italian Panini. Or skip the chicken from the Italian Panini and you got a Caprese Panini. Try roast beef with horseradish mayonnaise and cheddar cheese. Or even take your favorite sandwich and grill it (without lettuce though, unless you like your lettuce soggy and wilted). This is where you let your taste buds take you wherever it wishes! Have fun and Bon Apetit!
Friday, May 14, 2010
Chocolatier-ship
Chocolate lover? Craving those chocolate truffles? You can make them right in your kitchen for much less than what the cost at the store. Truffles can be easily $5/piece. Making your own? They cost about $0.50, quite a deal! And again, making your own truffles let you choose what flavors you want, imagine that!
I always keep baking chocolate tuck away in my pantry for when time calls for some serious chocolate making like a tea party! I prefer Ghirardelli chocolate products. Believe me they are worth the buck. Hersey and local brand chocolate has too much wax in my opinion. Food grade wax is usually added to chocolate to cut down the cost at most companies in the US. It also makes chocolate easier to work with but it does a lot of damage to the flavor of chocolate in my opinion. There are a few tricks to working with chocolate without adding wax.
A little background about chocolate, cocoa solids and cocoa butter are separated from a processed cocoa bean. These substances are combined in different ways to give us the different kinds of chocolate: milk, dark, and white.
White chocolate contains only sugar and cocoa butter, not cocoa solids. This is why its melting temperature is much lower than other type of chocolate. White chocolate is very easily scorched if you don't keep an eye on it.
The other two products use both cocoa solids and cocoa butter. There are other variances in chocolate type listed below occur by varying the temperature and time at which the beans are roasted before grinding.
Unsweetened chocolate is made of pure chocolate solids mixed with cocoa butter. It's also called baking chocolate or bitter chocolate. The flavor of this chocolate is strong, but it's not usually eaten on its own. Instead, unsweetened chocolate is used for making cookies, brownies, cakes and similar foods.
Dark chocolate is made from cocoa solids, cocoa butter and sugar. Usually dark chocolate has the cocoa solid concentration of 65% or more. This is my personal favorite. Besides tasting great it has some health benefits as well.
Milk chocolate is made similarly to dark chocolate, but it uses less cocoa and adds milk powder.
Semi-sweet chocolate is used mostly for cooking (such as in chocolate chip cookies). It's a low sugar type of dark chocolate.
Bittersweet chocolate is similar to semi-sweet chocolate, but uses more cocoa butter and less sugar. It's interchangeable in baking, but higher cocoa percentages usually indicate a less sweet chocolate.
Couverture is French for covering and refers to any chocolate with a high cocoa butter content. These chocolates contain high cocoa percentages as well as a high total fat content. Great for dipping! The price can be rather steep ($20/lbs) but you are still not paying $5/truffle. Couverture comes as tempered or untempered. You can find out on the package. Read below about the necessity of tempering your coating chocolate.
Cocoa powder is made by removing almost all of the cocoa butter from chocolate liquor and allowing the solids to dry. They're then ground. There are two main types of cocoa powder - natural, which is more acidic, and dutch process.
Compound chocolate refers to cocoa combined with vegetable fats like palm oil and wax. Not a true chocolate. This is what chocolate coating is. Very easy to work with but you sacrifice the taste of real chocolate. Most Hersey and local brand chocolate chips are compound chocolate. And believe me, the low price just isn't worth the taste. (Information from www.isnare.com)
So after a little back ground on chocolate. Let's get you started on your chocolatier-ship.
Truffles
To begin, you need to make a ganache, which is a mixture of melted semi-sweet chocolate and cream. The ratio should be 8oz of chocolate to 6 tbsp. of cream. And you can add any flavor you want. Add a little Creme De Menthe for a minty flavor, kirsche for cherry, amaretto for almond... the list goes on. This is why I like making my own truffles so much, there are so many choices! A table spoon of butter can be added to help the ganache stay tender.
Ganache can be used as a glaze over pound cake too, skip the butter for the glaze. The other thing you can do with ganache is adding 2 tbsp. of corn syrup and you got yourself a to-die-for chocolate sauce to top a sundae.
Let the ganache sit at room temperature until set or refridgerate a few minutes but not too long or it will be impossible to scoop it out. After the ganache is set, use a #60 scoop or any side you want to scoop out the chocolate. Drop the little scoops of chocolate onto a baking pan lined with wax paper.
You can either coat your truffles in cocoa powder, confectioner sugar, or melted dark, milk, or white chocolate, or one of each.
With a double boiler, melt in chunks around 8oz of couverture or any kind of chocolate that suit you taste. I use a double boiler because the heat is more gentle and you can monitor it a lot better to prevent scorching. Especially with couverture and white chocolate, since its cocoa butter content is so high, the melting point is much lower than regular chocolate, it scorched a lot more easily. You can also melt the chocolate in the microwave and stir every 5 minutes.
Tempering chocolate is very important for coating chocolate. The tempering process ensures that the cocoa butter in chocolate hardens in a uniform crystal structure. Chocolate that is tempered has a smooth texture, a glossy shine and a pleasant “snap” when bitten or broken. Chocolate that is not tempered might be cloudy, gray, lumpy, and sticky at room temperature.
Melt 2/3 of your chocolate first, cook on the double boiler until the temperature reaches 115 degrees or 110 for couverture and white chocolate. Then take off heat, stir in the remaining chocolate. When the temperature reaches 84 degree, put it back on the double boiler until it is 88-89 degree. Your chocolate is now properly tempered.
Dip your ganache balls in the tempered chocolate. The best dipping tool is your hand! Wear gloves for a neater clean up. But be ready to be covered in chocolate, quite a messy process. Put your dipped truffles back on the wax paper.
Melt some more dark or white chocolate for decoration.

Another chocolate product that I love to make is chocolate cups. They will dazzle your guests if the chocolate truffles don't. Mix 4 oz of chocolate chips with 1 tbsp. of shortening. Using a pastry brush, paint the chocolate onto mini muffin tinfoil. The paper ones are to filmsy. Pay close attention to the edge. The cup will break if the chocolate is too thin around the edge. Then put them into a mini muffin pan and refrigerate until set.

When the chocolate is dry, use a pair of tweezers to peel off the tin foils. And you got yourself some pretty little chocolate cups
 These cups can be filled with your favorite dessert mousse like white chocolate mousse, chocolate mousse... I like a cherry mousse with a maraschino cherry on top.
Cherry mousse
Heat 1 cup cherry preserve with 1 tsp unflavored gelatin and 1 tbsp. maraschino cherry juice over low heat until the preserve and the gelatin are melted, about 10 minutes. Then whip 1/4 cup of whip cream until stiff. Fold the whip cream into the cooled cherry mixture. Refridgerate until set.
After the cherry mousse is set, scoop it into the chocolate cup using a #60 scoop. Top the cup with a maraschino cherry. Chill until ready to serve. They are best served chilled.
I don't quite have a picture of the finished product. I will post it once I get some! They are not only pretty but also taste amazing!
Making chocolate takes a lot of time and practice. Don't give up after your first time. Trials and errors are a chocolatier's best friends. Soon you will packaging these for your friends and family with ease.
But as many as received Him, to them He gave the right to become children of God, even to those who believe in His name.
The title of this post is from John 1:12-13. We who believe in the name of Jesus are qualified to be children of God. And guess what! This is why I am such a tea party fanatic. It reminds me that I am a princess, daughter of the King. So I am telling you, tea is a spiritual thing. Plus, I just have so much fun throwing a proper tea party, every time!
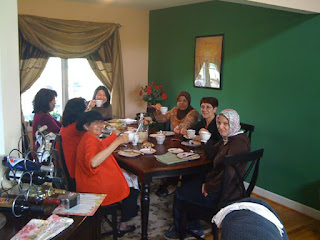 I had a big tea party at my house yesterday morning. This is probably the biggest tea that I've ever thrown, 26 women total. Praise the Lord that the weather was beautiful so we could sit outside. I just want to give my readers a few pointers about how to throw an English tea party. And next time the opportunity arises, you will throw the best tea party in the area!
 The first thing you want to decide is what kind of tea party you would like to throw. There are three:
1) Cream tea: tea, scones, clotted cream, and jam.
2) Light tea (sometimes calls part tea): tea, scones, clotted cream, and sweets.
3) Full tea: tea, scones, clotted cream, sweets, and savories.
You can use the above terms at a hotel in England and they will know exactly what to serve you. But be aware, a full tea could cost you up to £51 at a hoity-toity hotel.
So if you want to do something simple with a few friends, a cream tea would be an excellent choice. A light tea would be my favorite because I love making sweets and those tiny sandwiches are not my expertise. But I usually do a full tea because it can be a replacement for lunch or even dinner.
Another thing, the term high tea is often thrown around in the United States, but high tea is often refer to a full meal, which the British used to have for dinner. So if you are having a full tea as a meal, it might be ok to use the term. But otherwise, you are having a low tea. The term has nothing to so with how classy or not the event is.
The second thing you need to do is preparing for the tea. You will find some recipes in a few posts under dessert/sandwiches. But I am including the scone recipe here since it's not quite a tea party without scones.
Cream Scones
Whisk together:
2 cups all-purpose flour
1/4 cup sugar
2 tsp. baking powder
1/4 tsp. salt
Then cut it:
1/3 cup sold butter till pea size
Then mix in until just combined:
1 egg
1/4 cup whipping cream
1 tsp. vanilla
Roll the dough out immediately or chill until ready to bake the scones. I like to bake the scones right before they are ready to be served but they can be kept for a little while too. It's really up to you. Roll the dough out to about 1/3-1/2 of an inch in thickness. I cut them into small circles using a biscuit cutter instead of triangles. Trianglar scones are rather American. British tea scones are made into circles. I do believe they taste better too because the scones come out smaller, leaving you wanting more. Bake for 14 minutes in a 375 degree preheated oven. These scones are to die for. They are light and sweet, a perfect companion with any kind of tea.
Clotted cream/devonshire cream can't be forgotten (I did forget yesterday though, I was quite ashamed) to top those heavenly scones. I think clotted cream is the best thing the British ever came up with. It is rather hard to find such a thing in the US. In bigger cities, you can find it at a higher-end grocery store. But in a small town like Blacksburg, VA, it is almost impossible. I spotted some at a kitchen store, Gourmet Pantry in town a little while ago. But they were out when it came time for a tea party, quite sad! This is what a bottle of devonshire cream looks like:
 You can also order a bottle online. They have very good shelf life in the fridge before opening. They last around 2 weeks after opening. Can't find it online, make it yourself!
There is only one ingredient: heavy whipping cream (best if unpasteurized or pasteurized instead of ultra-pasteurized and find one with the highest fat content possible). Use as much as you want. The clotted cream will last in the refrigerator for 3-4 days. Pour the cream into a heavy-bottomed oven-safe pot. The cream should come up the side of the pot between one and three inches. Cover the pot and put it in the oven on 180 F. Leave the covered pot in the oven for at least 8 hours. It is done when there is a thick yellowish skin above the cream, which is the clotted cream. Let the pot cool at room temperature, then put it in the refrigerator for another 8 hours. Remove the clotted cream from the top of the pot. You can still use the cream underneath for cooking or baking.
The work above is not your cup of tea? You can settle for this recipe:
Whip together until thick:
4 oz mascarpone cheese
1 cup heavy whipping cream
1 tbsp sugar
 I had a big tea party at my house yesterday morning. This is probably the biggest tea that I've ever thrown, 26 women total. Praise the Lord that the weather was beautiful so we could sit outside. I just want to give my readers a few pointers about how to throw an English tea party. And next time the opportunity arises, you will throw the best tea party in the area!
 The first thing you want to decide is what kind of tea party you would like to throw. There are three:
1) Cream tea: tea, scones, clotted cream, and jam.
2) Light tea (sometimes calls part tea): tea, scones, clotted cream, and sweets.
3) Full tea: tea, scones, clotted cream, sweets, and savories.
You can use the above terms at a hotel in England and they will know exactly what to serve you. But be aware, a full tea could cost you up to £51 at a hoity-toity hotel.
So if you want to do something simple with a few friends, a cream tea would be an excellent choice. A light tea would be my favorite because I love making sweets and those tiny sandwiches are not my expertise. But I usually do a full tea because it can be a replacement for lunch or even dinner.
Another thing, the term high tea is often thrown around in the United States, but high tea is often refer to a full meal, which the British used to have for dinner. So if you are having a full tea as a meal, it might be ok to use the term. But otherwise, you are having a low tea. The term has nothing to so with how classy or not the event is.
The second thing you need to do is preparing for the tea. You will find some recipes in a few posts under dessert/sandwiches. But I am including the scone recipe here since it's not quite a tea party without scones.
Cream Scones
Whisk together:
2 cups all-purpose flour
1/4 cup sugar
2 tsp. baking powder
1/4 tsp. salt
Then cut it:
1/3 cup sold butter till pea size
Then mix in until just combined:
1 egg
1/4 cup whipping cream
1 tsp. vanilla
Roll the dough out immediately or chill until ready to bake the scones. I like to bake the scones right before they are ready to be served but they can be kept for a little while too. It's really up to you. Roll the dough out to about 1/3-1/2 of an inch in thickness. I cut them into small circles using a biscuit cutter instead of triangles. Trianglar scones are rather American. British tea scones are made into circles. I do believe they taste better too because the scones come out smaller, leaving you wanting more. Bake for 14 minutes in a 375 degree preheated oven. These scones are to die for. They are light and sweet, a perfect companion with any kind of tea.
Clotted cream/devonshire cream can't be forgotten (I did forget yesterday though, I was quite ashamed) to top those heavenly scones. I think clotted cream is the best thing the British ever came up with. It is rather hard to find such a thing in the US. In bigger cities, you can find it at a higher-end grocery store. But in a small town like Blacksburg, VA, it is almost impossible. I spotted some at a kitchen store, Gourmet Pantry in town a little while ago. But they were out when it came time for a tea party, quite sad! This is what a bottle of devonshire cream looks like:
You can also order a bottle online. They have very good shelf life in the fridge before opening. They last around 2 weeks after opening. Can't find it online, make it yourself!There is only one ingredient: heavy whipping cream (best if unpasteurized or pasteurized instead of ultra-pasteurized and find one with the highest fat content possible). Use as much as you want. The clotted cream will last in the refrigerator for 3-4 days. Pour the cream into a heavy-bottomed oven-safe pot. The cream should come up the side of the pot between one and three inches. Cover the pot and put it in the oven on 180 F. Leave the covered pot in the oven for at least 8 hours. It is done when there is a thick yellowish skin above the cream, which is the clotted cream. Let the pot cool at room temperature, then put it in the refrigerator for another 8 hours. Remove the clotted cream from the top of the pot. You can still use the cream underneath for cooking or baking.
The work above is not your cup of tea? You can settle for this recipe:
Whip together until thick:
4 oz mascarpone cheese
1 cup heavy whipping cream
1 tbsp sugar

Wednesday, May 12, 2010
Smoother than Silk
We had a group of guys over to play games last night. I was wondering what to make since they are coming over after dinner. It is pretty hard to make a manly dessert. Let's face it, dessert was made for women! But thankfully, men will eat anything! So I decided to make a French Silk pie.

Interesting enough, French silk pie did not come from France. It is strictly American and came from the South. Hard to say who invented it. But it is heavenly for sure. I am surprised the French didn't already come up with something like that.
For the crust:
8 oz chocolate wafers (Oreos are fine without cream in the middle)
1/2 stick of melted butter (1/4 cup)
Traditionally, French silk pie is made with a graham cracker crust. But I made mine with a chocolate crust just because you can never have too much chocolate in one dessert. So for the crust, I put 8 oz of chocolate wafers in the food processor with half a stick of melter butter. After the wafers are all pulsed, press the mixture into a 9-inch springform pan. Bake at 375 degree for 10 minutes then cool completely.
The filling:
3 eggs
1/3 cup sugar
4 oz bitter sweet chocolate morsels
1 stick butter
1 cup whipping cream
For the filling, originally, eggs were used without being cooked. I am sure most of us are sketched out by that idea. So I cook my eggs over a double boiler. Bring some water to a simmer in a sauce pan and put a heat proof bowl on top of the pan, be careful not to let the bowl touch the simmering water. Put 3 eggs and 1/3 cup sugar in the bowl and whip with a hand mixer on medium.
My hand mixer broke a while ago and I've been just fine without one thanks to my stand mixer. But I can't quite use my stand mixer for this task. My husband got creative (he's extremely good at that) and attached a whisk to his electric screw driver and voila, I have a hand mixer (entirely too heavy and way too much power for whipping a few eggs) that works wonders.
Back to the pie filling, whip your egg mixture in the double boiler for about 10 minutes until it double in volume and the temperature gets to 160. Take the bowl off heat and continue to whisk while adding 4 oz of bittersweet chocolate morsels a table spoon at a time. The egg will subside as you add the chocolate. After the chocolate is incorporated, add 1 stick of butter in small cubes and whip. You should add one cube at a time and let the butter be whipped into the egg and chocolate mixture instead of melted it. This will help thicken the filling and keep it light.
Whip 1 cup of whipping cream and fold into the egg mixture. Folding will keep the volume of the whipped cream keeps your pie filling lighter than air. Spread the mixture onto cool crust and let chill for a few hours until the filling set. It takes no time at all with the eggs and whipped butter.
After the filling is set, whip 1 cup of whipping cream and spread over the top of the pie filling. I prefer whipping my own cream over cool whip because it is more stable and a lot creamier without any artificial flavoring that cool whip has (I think if you have read the label on a tub of Cool Whip you'd agree with me). Garnish with a few chocolate curls or chocolate shaving. Chill until you are ready to serve. The pie did not last very long last night. I am glad I sneaked a picture before it was devoured. It is truly smoother than silk!!

Subscribe to:
Posts (Atom)